一、HbuilderX打包本地离线资源包www
二、安装homebrew安装
参考博客:https://www.jianshu.com/p/05dd61d7d9fa
未安装homebrew直接安装ruby会出现错误提示:
/bin/bash -c "$(curl -fsSL https://raw.githubusercontent.com/Homebrew/install/HEAD/install.sh)"如果官网安装速度觉得慢,可以试试国内安装连接,序列号选择(1)
/bin/zsh -c "$(curl -fsSL https://gitee.com/cunkai/HomebrewCN/raw/master/Homebrew.sh)"
三、安装ruby
1.查询当前可用ruby版本列表:
brew search rubyLast login: Mon Oct 30 14:44:42 on console
admin@SuperMac ~ % brew search ruby
==> Formulae
chruby ruby-build
chruby-fish ruby-completion
cucumber-ruby ruby-install
imessage-ruby ruby@2.6
jruby ruby@2.7 ✔
mruby ruby@3.0
mruby-cli ruby@3.1
rbenv-bundler-ruby-version rubyfmt
ruby
==> Casks
rubymine rubymotion2.安装指定版本ruby
brew install ruby@2.7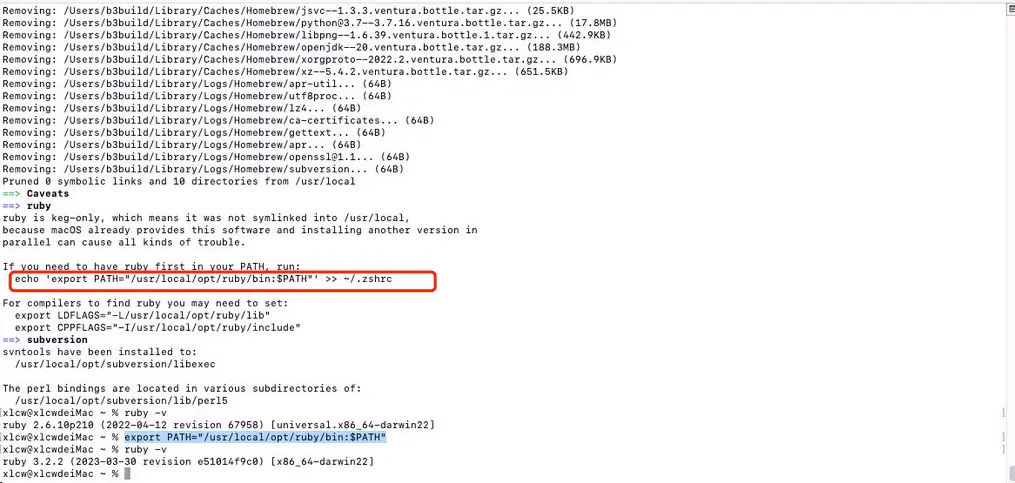
终端会提示你如果想使用最新的ruby,可以设置环境变量 export PATH="/usr/local/opt/ruby/bin:$PATH"
3.检查当前ruby版本
ruby -v显示结果:
admin@SuperMac ~ % ruby -v
ruby 2.6.10p210 (2022-04-12 revision 67958) [universal.x86_64-darwin22]
版本号依然显示2.6.1,因为环境变量没有指向最新的ruby库
4.修改ruby环境变量
打开用户环境变量配置文件(隐藏文件) /Users/admin/.bash_profile
先打开访达,使用分栏显示,然后按组合键 comand + shift + . 即可设置 显示/不显示 隐藏文件
打开 .bash_profile 文件编辑
在文末添加变量
export PATH="/usr/local/opt/ruby/bin:$PATH"或者添加
export PATH="/usr/local/opt/ruby@2.7/bin:$PATH"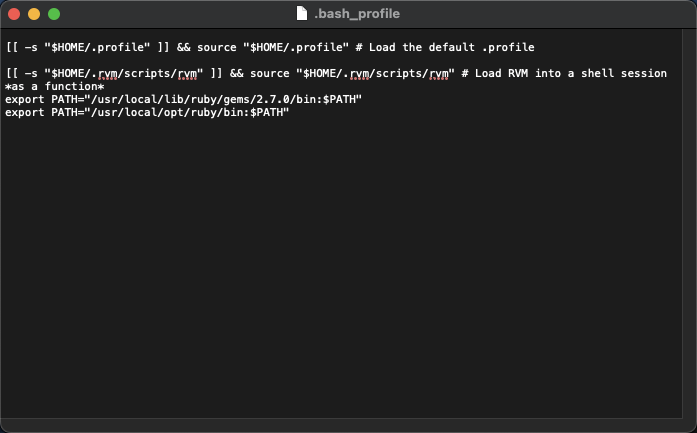
5.重新加载环境变量
打开终端执行命令
source ~/.bash_profile6.重新检查ruby版本,正常显示
admin@SuperMac bin % ruby -v
ruby 2.7.8p225 (2023-03-30 revision 1f4d455848) [x86_64-darwin22]7、ruby镜像源
先查看ruby镜像源
gem sources-l8.替换ruby镜像源
gem sources --add https://gems.ruby-china.com/ --remove https://rubygems.org/9、gem升级
因为降级ruby到2.7后,gem就和ruby的版本对上了,但是gem里面一些库需要升级,也就代表着gem需要升级到新的版本,这个是我们升级ruby到2.7.10后,调用gem install cocoapods后报的错,如下提示:需要gem升级到3.4.17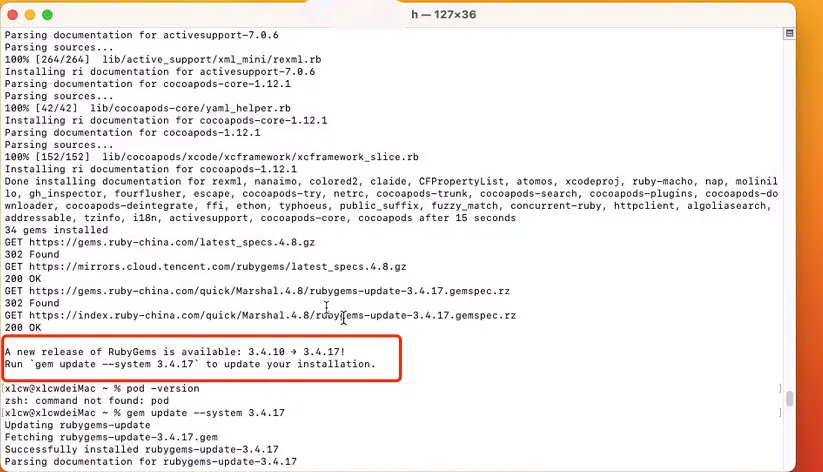
终端执行gem升级到3.4.17:
gem update --system 3.4.17升级完后查看gem版本是否升级到3.4.17
gem -v四、安装Cocoapods
1.安装命令
gem install cocoapods -V2.检验pod是否可用
打开终端输入 pod
报错提示:
zsh: command not found: pod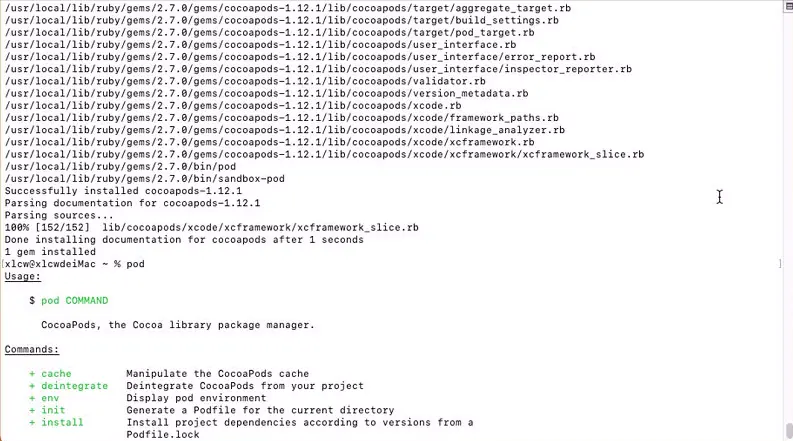
3.修改gem环境变量
修改.bash_profile文件,文末添加gem路径要在终端中查看实际版本号 2.7.0
export PATH="/usr/local/lib/ruby/gems/2.7.0/bin:$PATH"4.重载环境变量文件
source ~/.bash_profile重新检验pod
admin@SuperMac bin % pod
Usage:

    $ pod COMMAND

      CocoaPods, the Cocoa library package manager.

Commands:

    + cache         Manipulate the CocoaPods cache
    + deintegrate   Deintegrate CocoaPods from your project
    + env           Display pod environment
    + init          Generate a Podfile for the current directory
    + install       Install project dependencies according to versions from a
                    Podfile.lock
    + ipc           Inter-process communication
    + lib           Develop pods
    + list          List pods
    + outdated      Show outdated project dependencies
    + plugins       Show available CocoaPods plugins
    + repo          Manage spec-repositories
    + search        Search for pods
    + setup         Set up the CocoaPods environment
    + spec          Manage pod specs
    + trunk         Interact with the CocoaPods API (e.g. publishing new specs)
    + try           Try a Pod!
    + update        Update outdated project dependencies and create new Podfile.lock

Options:

    --allow-root    Allows CocoaPods to run as root
    --silent        Show nothing
    --version       Show the version of the tool
    --verbose       Show more debugging information
    --no-ansi       Show output without ANSI codes
    --help          Show help banner of specified command
五、修改XCode配置
常见错误:
打开工程项目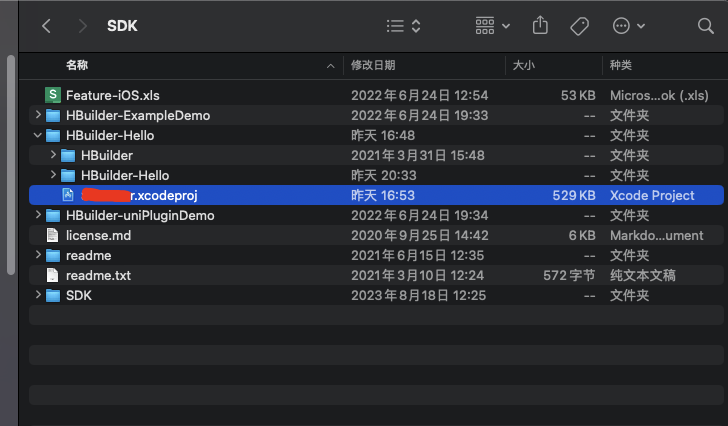
1.修改dcloud_appkey
打开如图的 info.plist 文件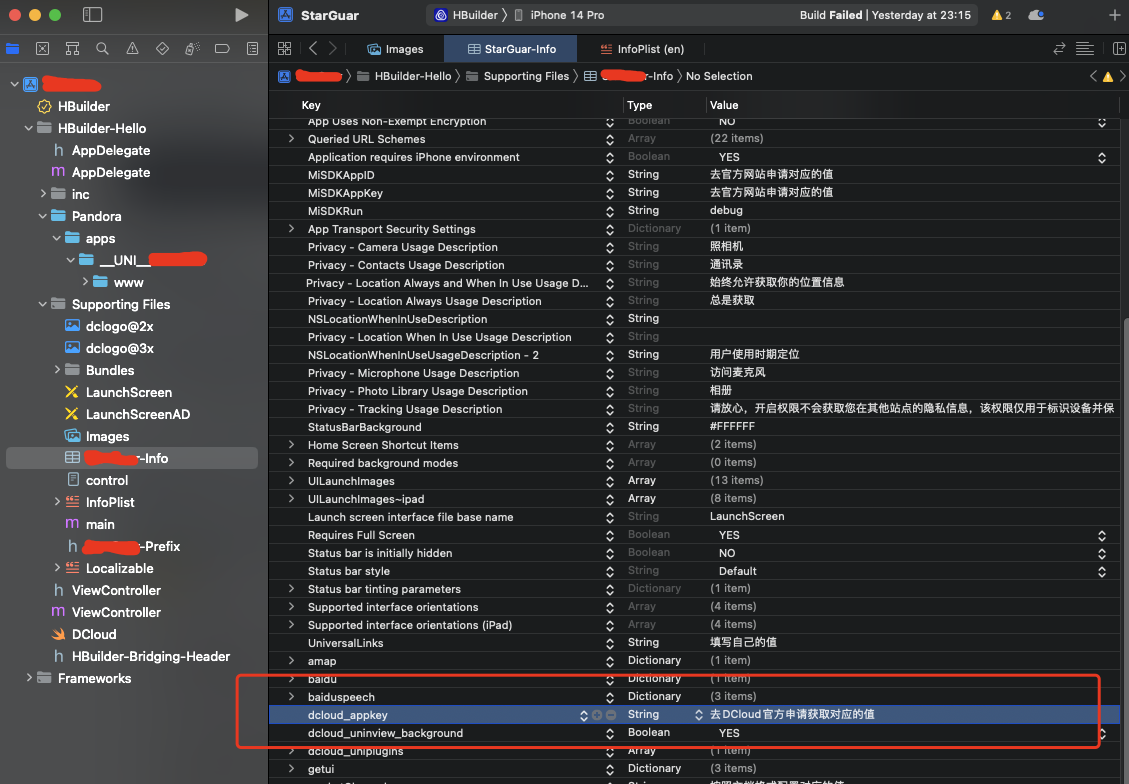
2.导入签名证书
(1)打开设置Settings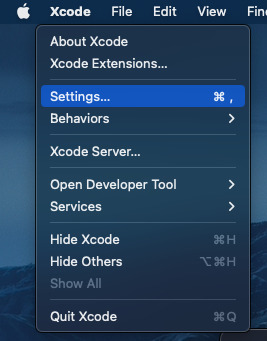
(2)登录拥有开发者权限的账号
会看到个人和团队证书管理,点击 Manage Certificastes 管理证书列表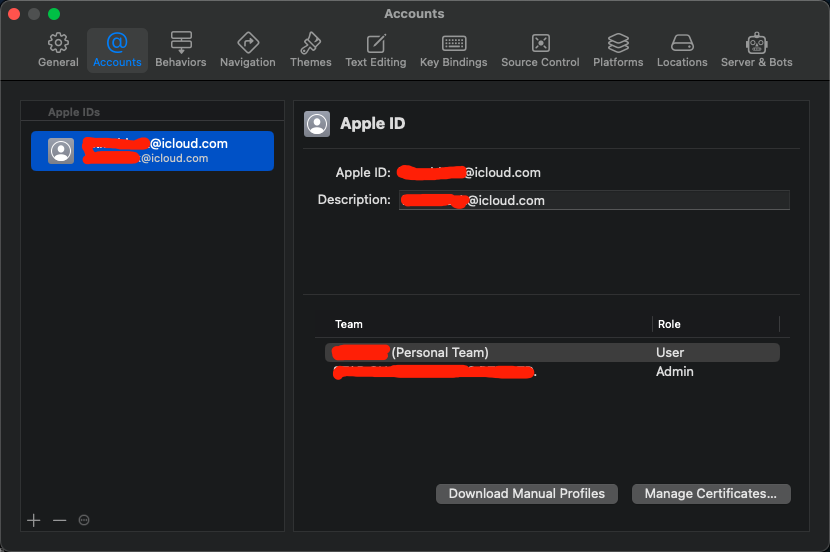
(3)从苹果开发者官网创建证书和描述文件后,下载到本地,如下图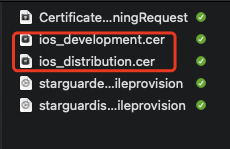
(4)导入开发证书和发布证书到本地Mac上
各自双击下载的证书文件(即 .cer 文件)就会看到两个iPhone证书如下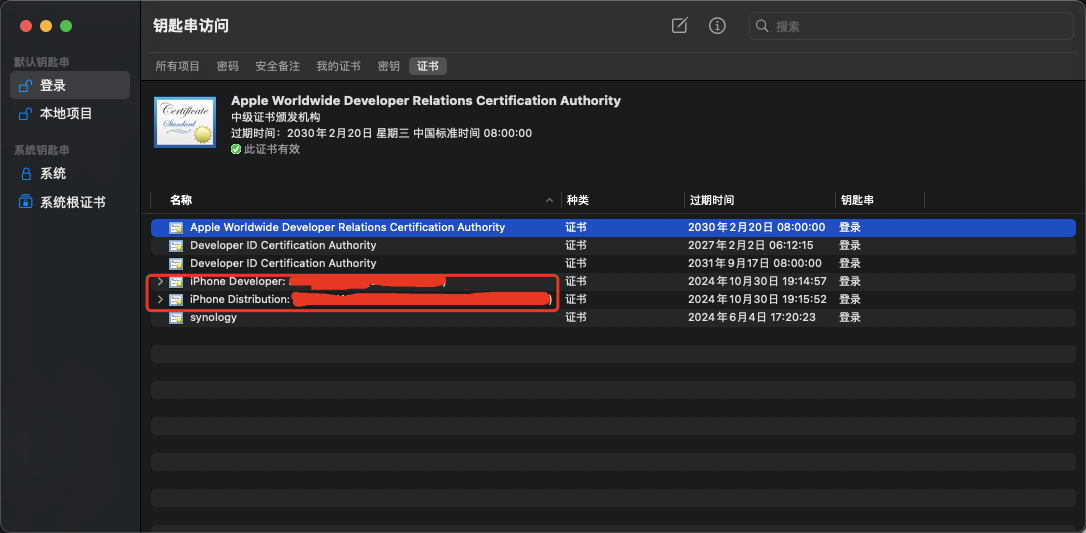
(5)点击左下角 + 号导入Mac本地安装的证书后,即会展示两个证书,还有一个 Mac Installer Distribution 的证书是没用的,可以在开发者官网证书列表删除(即Revoke)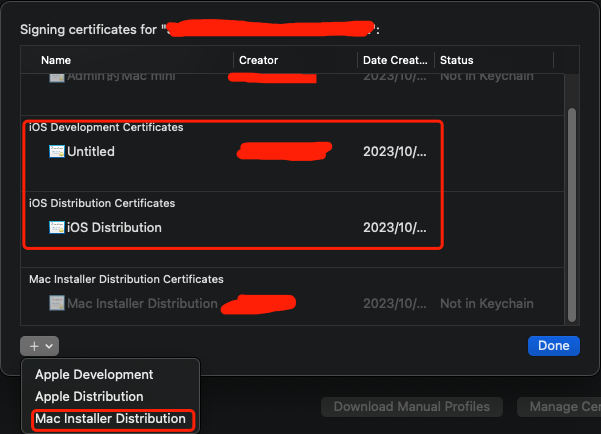
2.修改配置
(1)工程目录-TARGETS-General
- Minimum Deployments
iOS:12.0
- Identity
App Category:Finance
Display Name:StarGuar
3.国际化
4.启动图、消息通知图标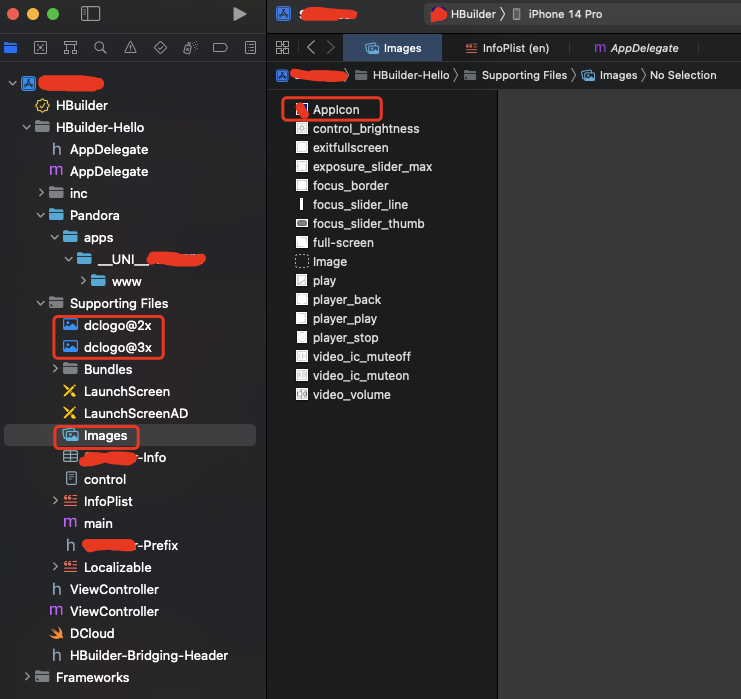
替换掉这几个目录下的同尺寸图片即可
5.编译打包
打包Archive一直到Upload前都顺利,Upload的时候突然中断提示说"info.plist"文件第n行字符错误。前面修改info.plist文件的时候就遇到过了,是由于用向日葵远程复制旧项目info.plist文件内容过来的时候会附带 Null 字样(使用Notepad--软件)的空格字符,会导致该文件在xcode里都直接打不开,更别说上传到AppleConnect了


![[!] No `Podfile' found in the project directory.](/usr/themes/Joe/assets/npm/typecho-joe-next@6.0.0/assets/thumb/17.jpg)
评论 (0)